Linux jumpserver搭建及使用 发表于 2022-01-20 浏览量 1207 没有评论 #jumpserver堡垒机概述 1、 跳板机概述 跳板机就是一台服务器,开发或运维人员在维护过程中需要统一登录到这台服务器,然后再登录到目标设备进行维护和操作。 跳板机的缺点:没有实现对运维人员操作行为的控制和审计,使用跳板机的过程中还是会出现误操作、违规操作导致的事故,一旦出现操作事故很难快速定位的原因和责任人。 2、 堡垒机的概述 堡垒机,即在一个特定的网络环境下,为了保障网络和数据不受来自外部和内部用户的入侵和破坏,而运用各种技术手段实时收集和监控网络环境中每一个组成部分的系统状态、安全事件、网络活动,以便集中报警、及时处理及审计定责。 总结:堡垒机比跳板机 多了实时收集、监控网络环境、集中报警等功能。 3、 jumpserver概述 Jumpserver是一款使用 Python, Django 开发的开源跳板机系统 , 为 互联网企业 提供了 认证,授权,审计,自动化运维 等功能。 [jumpserver官网](https://jumpserver.org/) 4、 jumpserver堡垒机组件说明 1)Jumpserver现指Jumpserver 管理后台,是核心组件( Core )), 使用 Django Class Based View 风格开发,支持 Restful API 。 2)Coco实现了SSH Server 和 Web Ter minal Server 的组件,提供 SSH 和 WebSocket 接口 , 使用Paramiko 和 Flask 开发。 3)Luna现在是Web Terminal 前端,计划前端页面都由该项目提供, Jumpserver 只提供 API ,不再负责后台渲染 html 等。 注意:实验环境jumpserver服务端的内存和cpu核心数调大点,防止在编译软件包的时候因为资源不足导致死机等其它故障情况。建议内存4G、CPU4核心。 #安装步骤 这里选择快速部署,到官网下载安装脚本,执行脚本即可。 ``` [root@ak80:/opt/setuptools]$ curl -sSL https://github.com/jumpserver/jumpserver/releases/download/v2.2.2/quick_start.sh | sh #下载并执行,等待即可 完毕! Created symlink from /etc/systemd/system/multi-user.target.wants/nginx.service to /usr/lib/systemd/system/nginx.service. JumpServer 部署完成 执行 ./jmsctl.sh start 启动 [root@ak80:~]$ find / -name jmsctl.sh #安装完,脚本存放在/opt/setuptools/下 /opt/setuptools/jmsctl.sh [root@ak80:~]$ cd /opt/setuptools/ [root@ak80:/opt/setuptools]$ ./jmsctl.sh start #启动服务 JumpServer 启动成功! Web 登陆信息: http://172.16.6.10:80 SSH 登录信息: ssh admin@172.16.6.10 -p2222 初始用户名密码: admin admin [如果你是云服务器请在安全组放行 80 和 2222 端口] ``` - 常用命令 ``` [root@ak80:/opt/setuptools]$ ./jmsctl.sh --help Usage: jmsctl [COMMAND] ... jmsctl --help Commands: download 下载 JumpServer install 安装 JumpServer start 启动 JumpServer stop 停止 JumpServer restart 重启 JumpServer status 检查 JumpServer uninstall 卸载 JumpServer upgrade 升级 JumpServer reset 重置组件 ``` #登录web界面  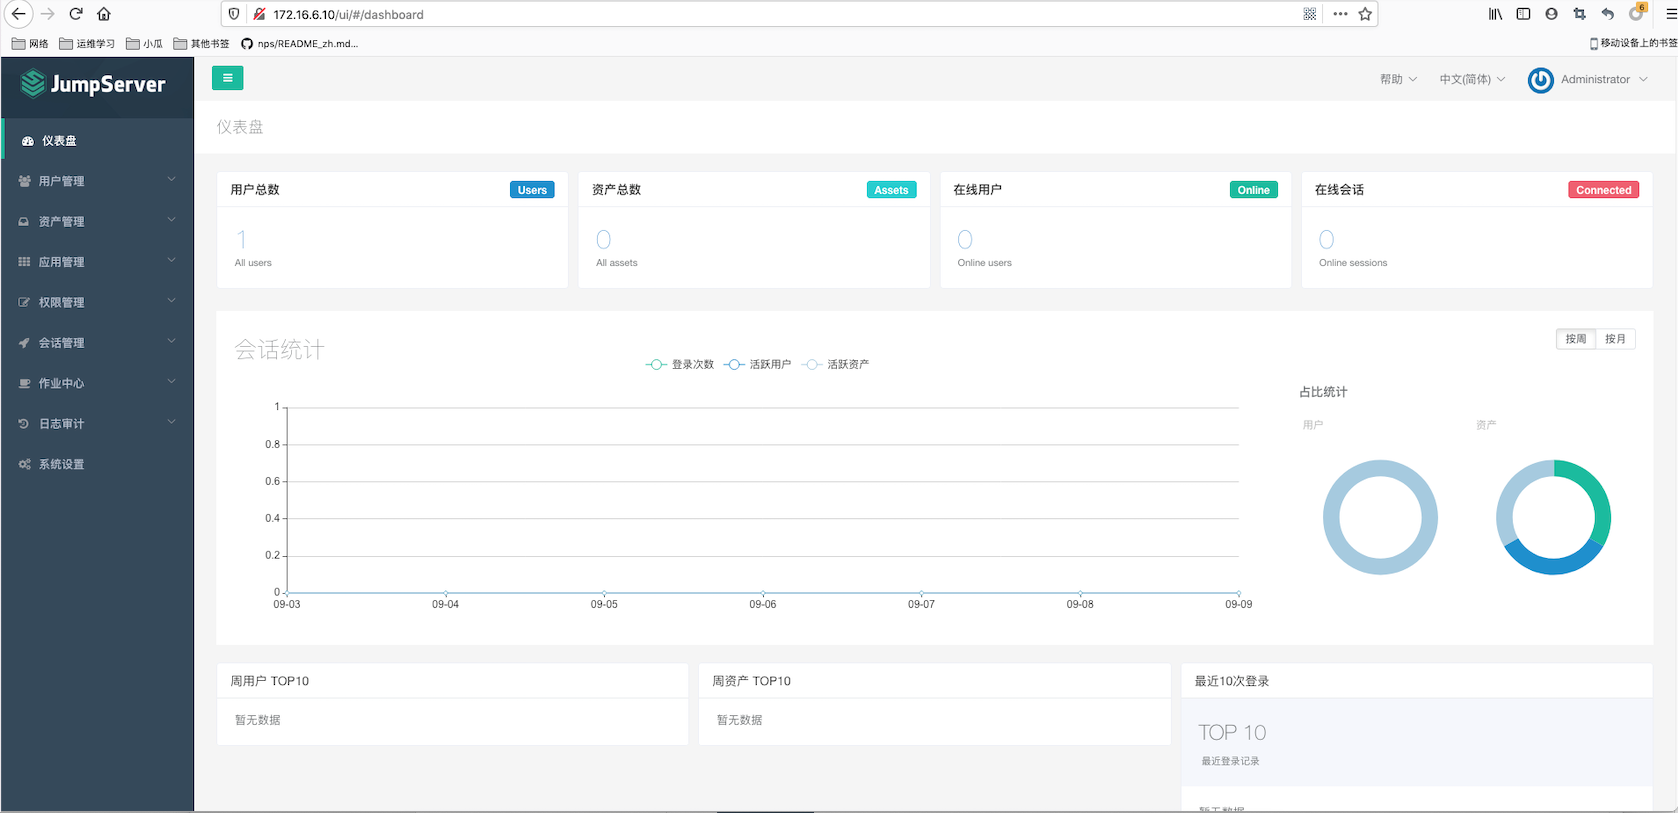 ##配置邮件发送密码链接 1)设置基本配置 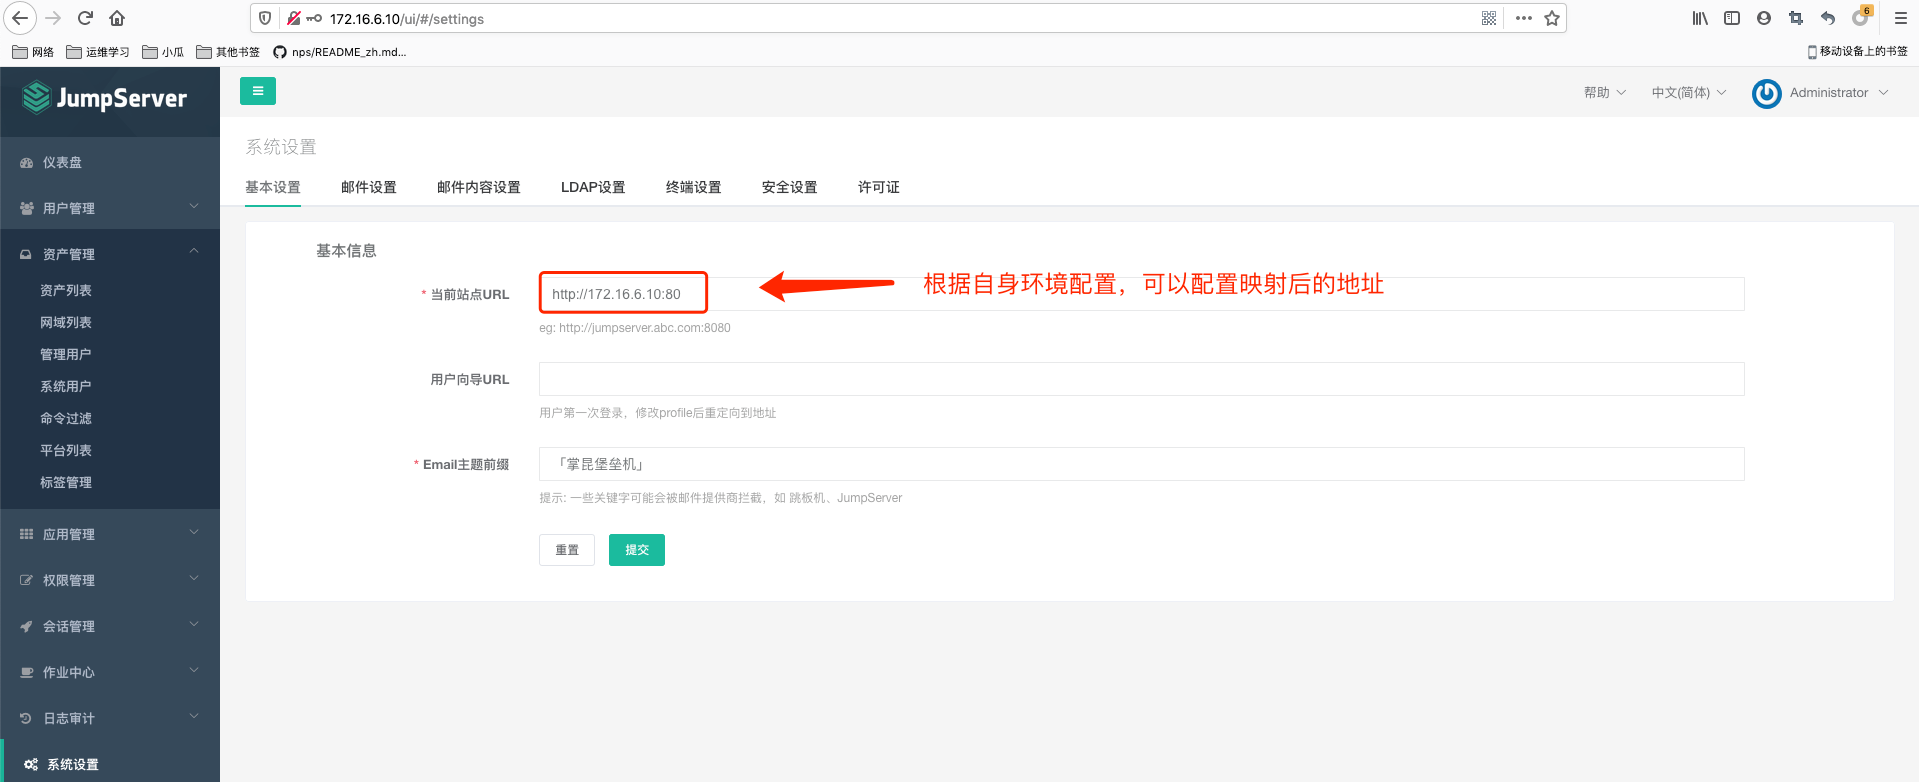 2)设置发送邮箱的地址跟发送的账号密码。 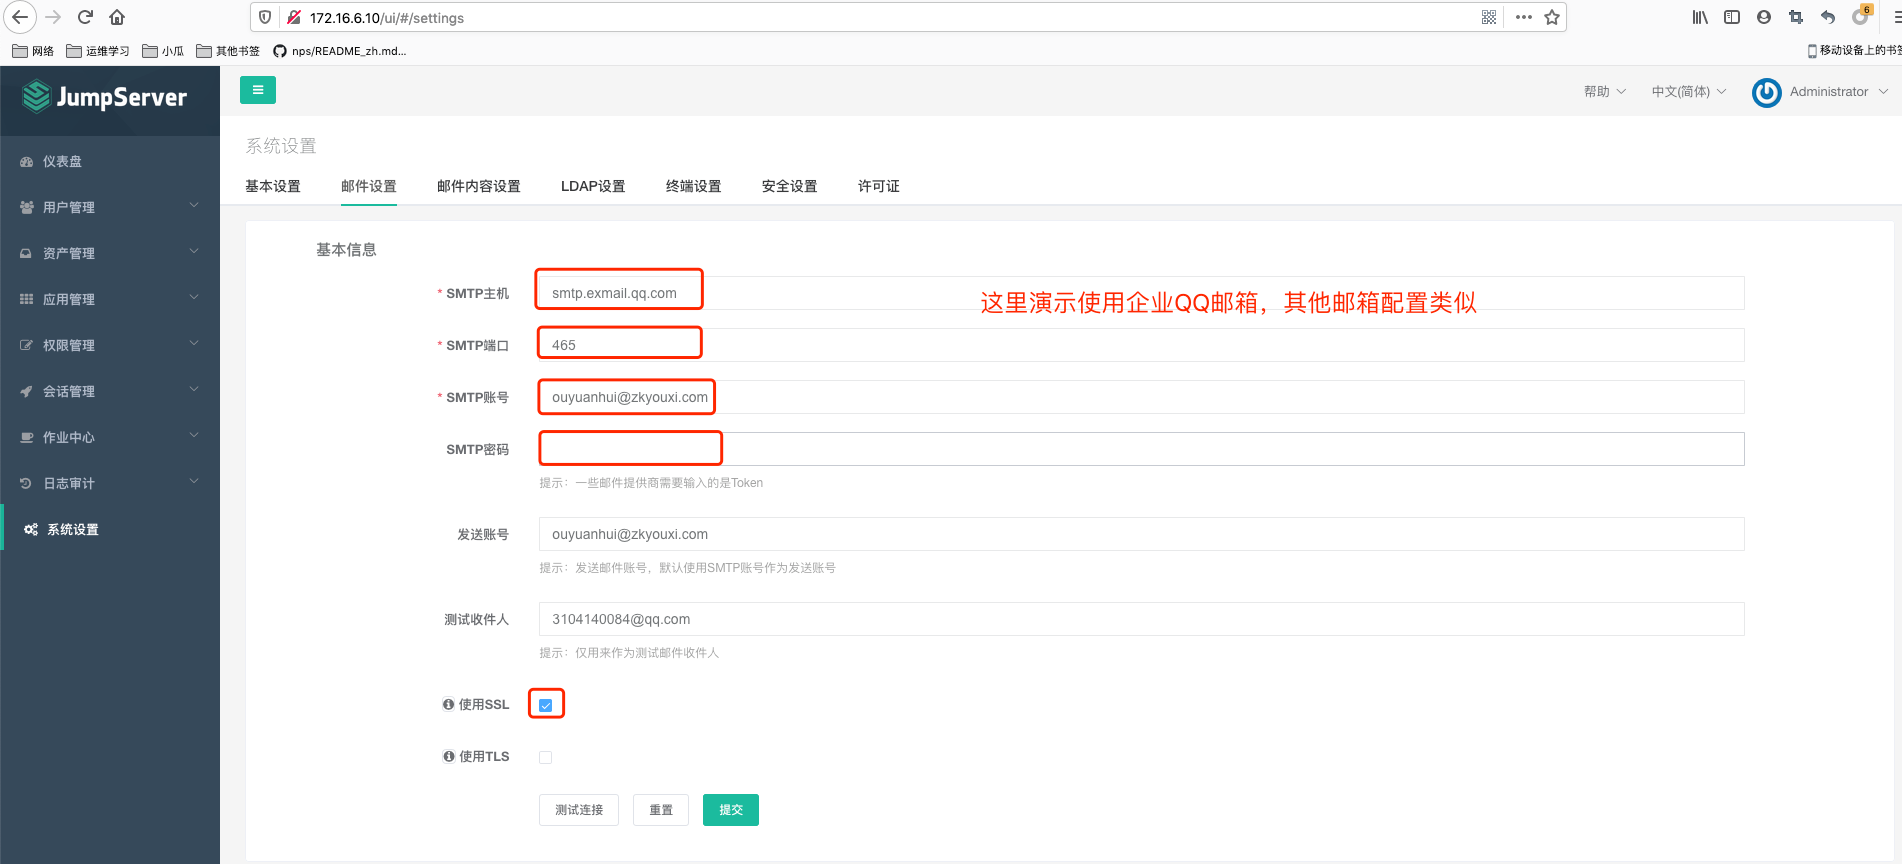 3)设置邮件内容 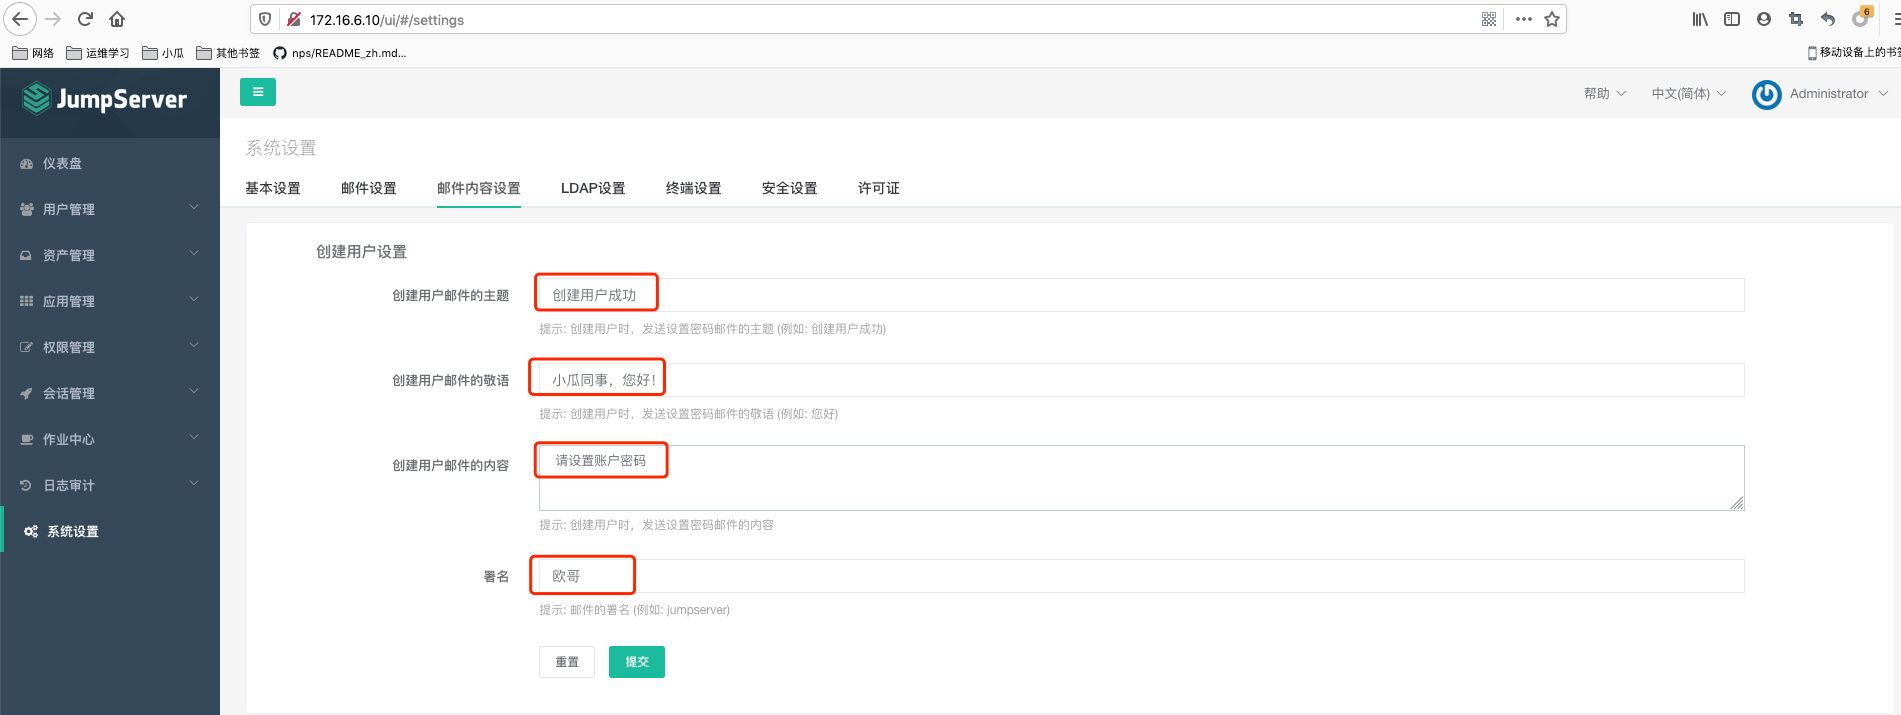 #新建用户,组。 jumpserver有三套用户 ``` jumpserver用户:用于登录到jumpserver,对外提供 管理用户:是拥有客户机有较高权限的用户,堡垒机需要管理客户机,一般都是root 系统用户:最终登录到客户机的用户,可以新建相应权限的用户。 ``` ## 创建jumpserver用户  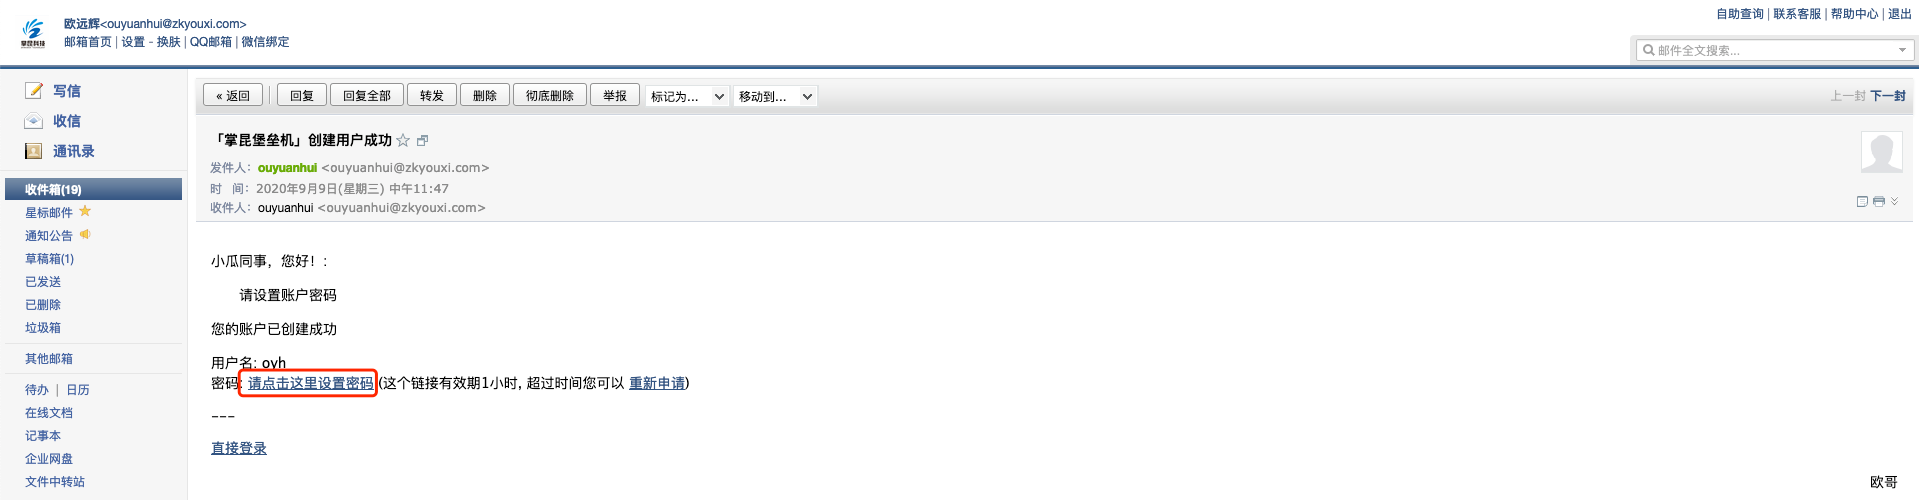 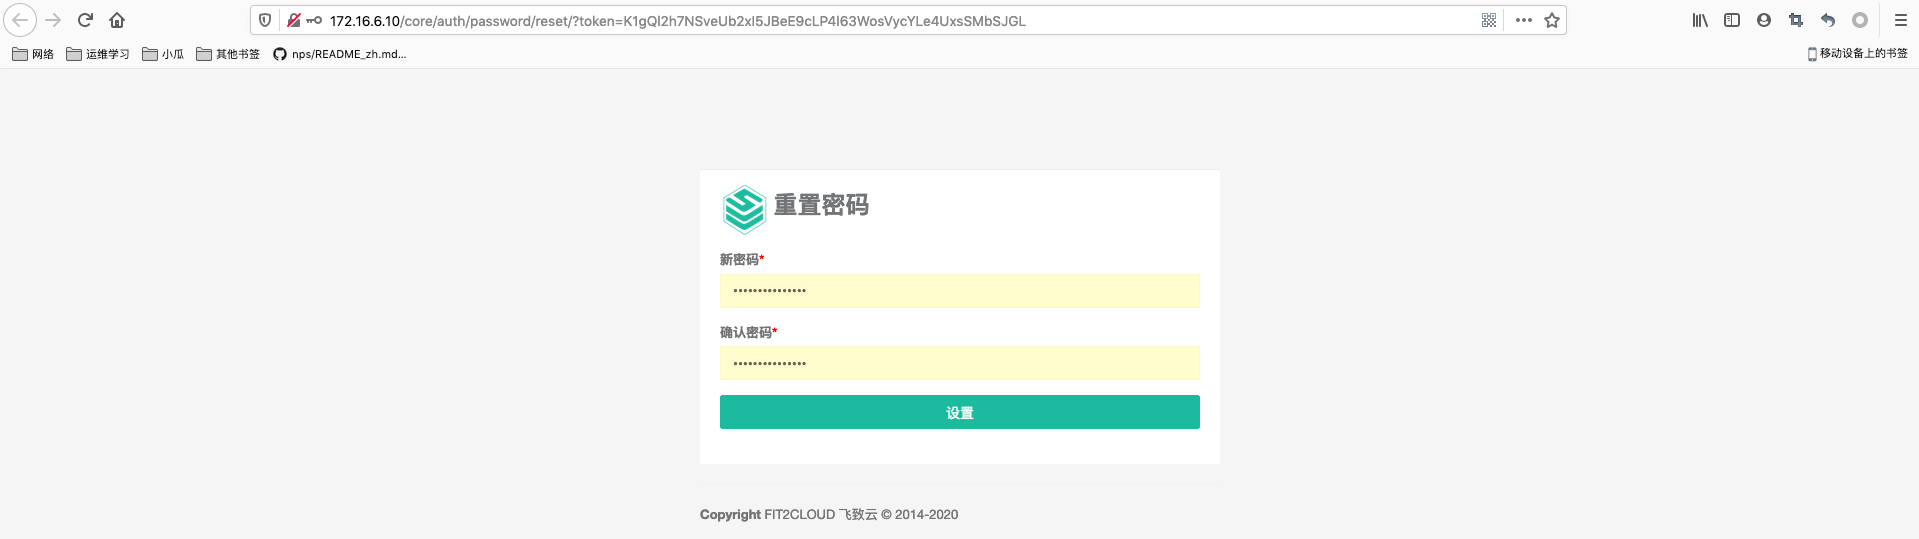 ##创建组 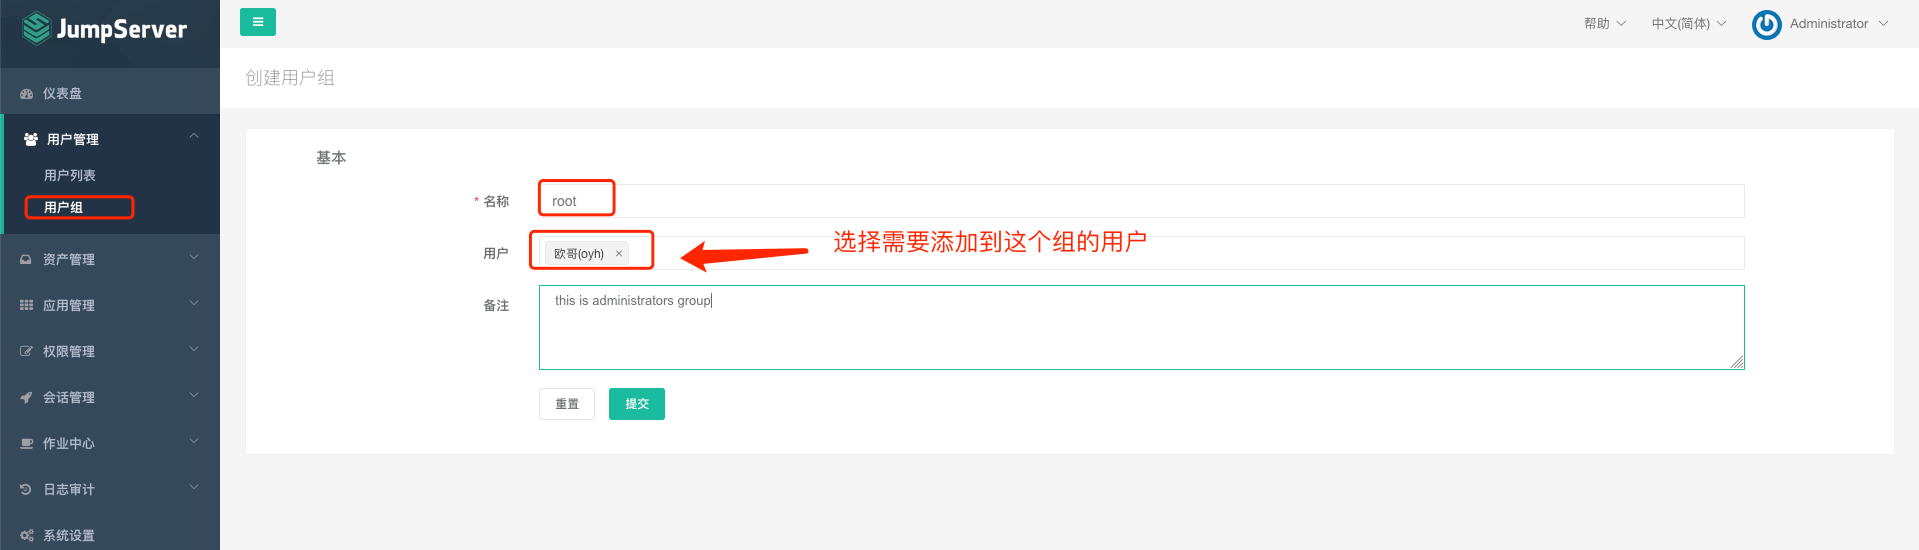 ##创建管理用户 1) 因为管理用户需要有客户机较高的权限,因此,我们需要在堡垒机生成秘钥对,把私钥放到jumpserver,把公钥传送到各客户机上。 ``` [root@ak80:~/.ssh]$ ssh-keygen [root@ak80:~/.ssh]$ ls id_rsa id_rsa.pub [root@ak80:~/.ssh]$ ssh-copy-id root@172.16.7.201 #201为客户机 ``` 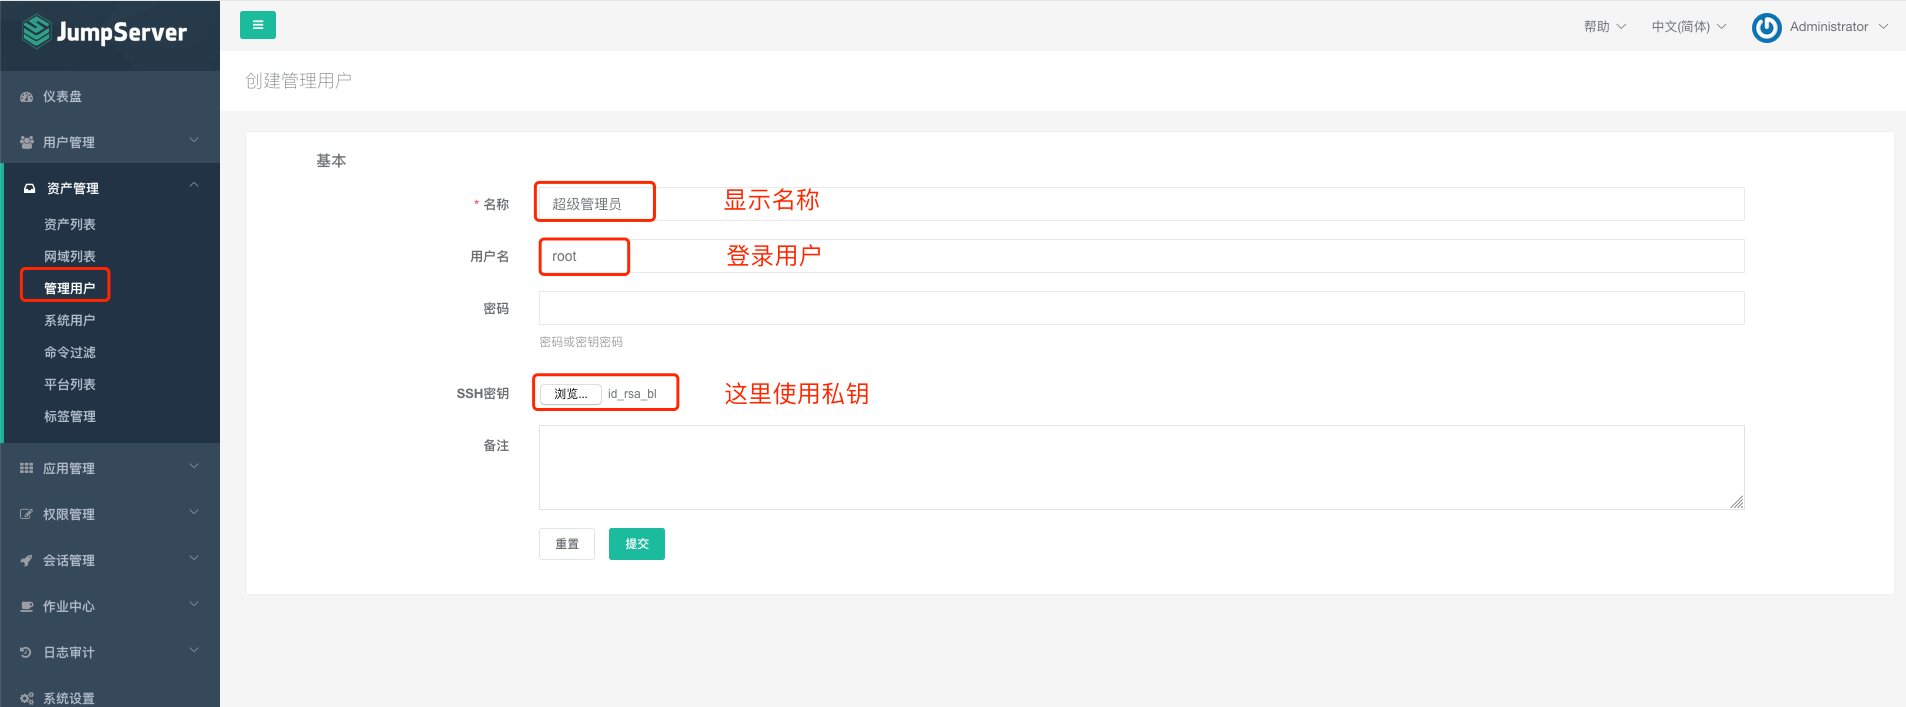 ##创建系统用户 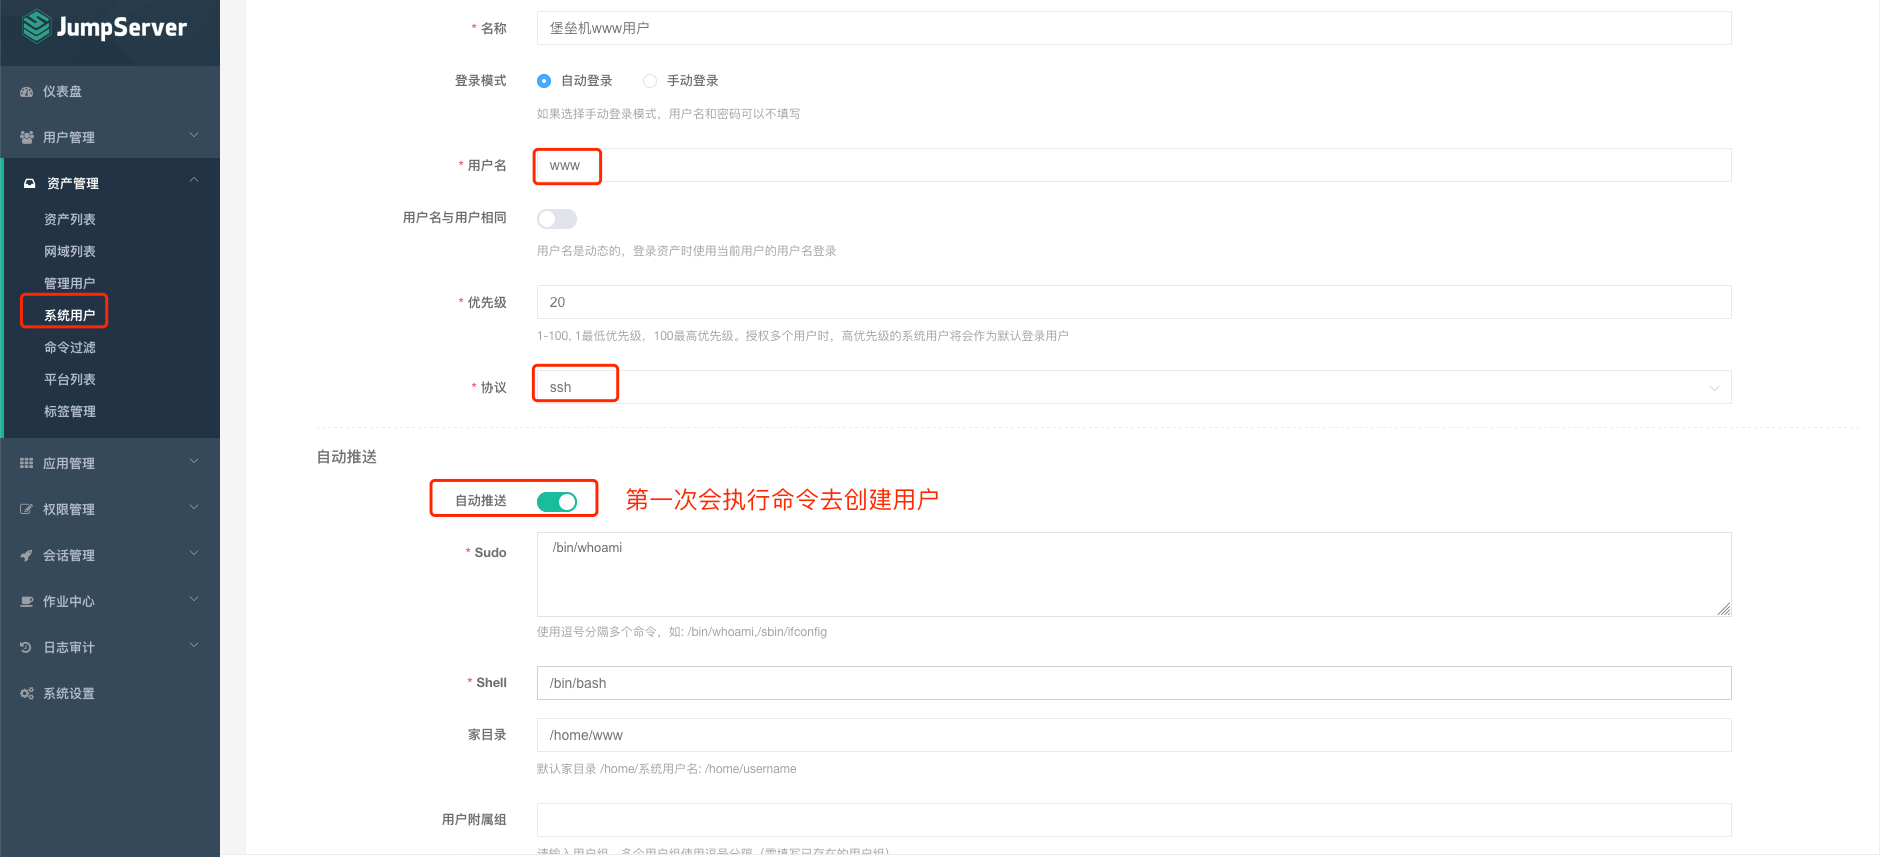 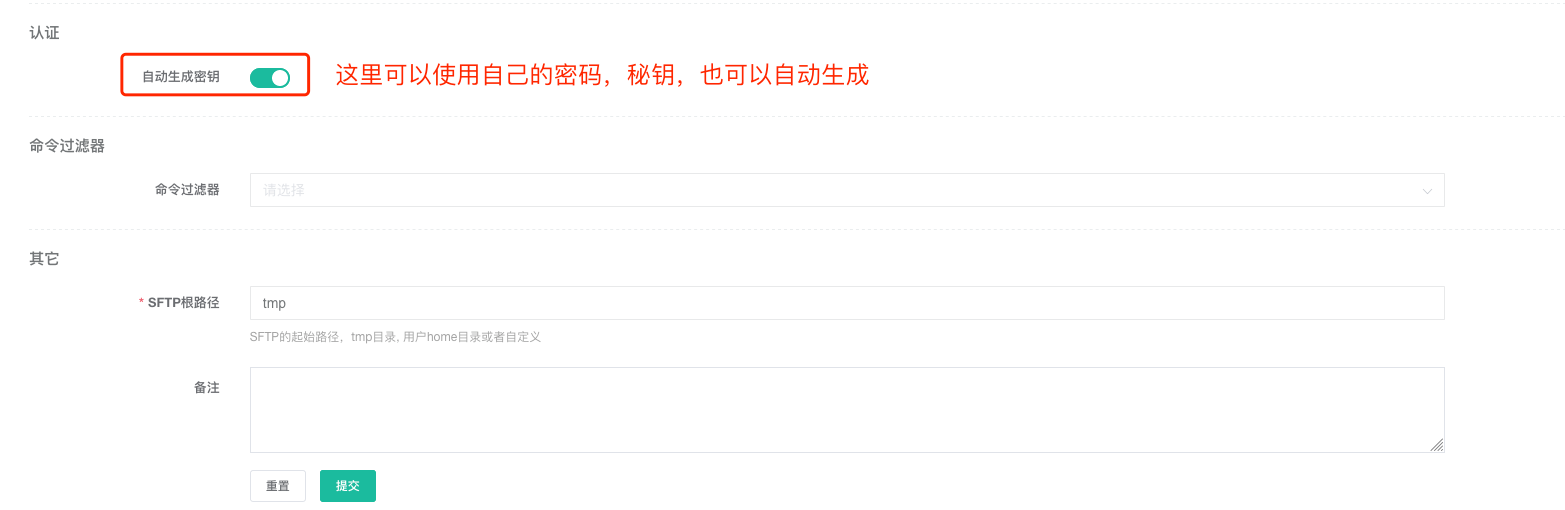 ##资产列表 把客户机添加到资产列表,可以自定义分组。  能正常获取到该客户机的硬件信息、看到可连接图标,说明已经可以连接了。 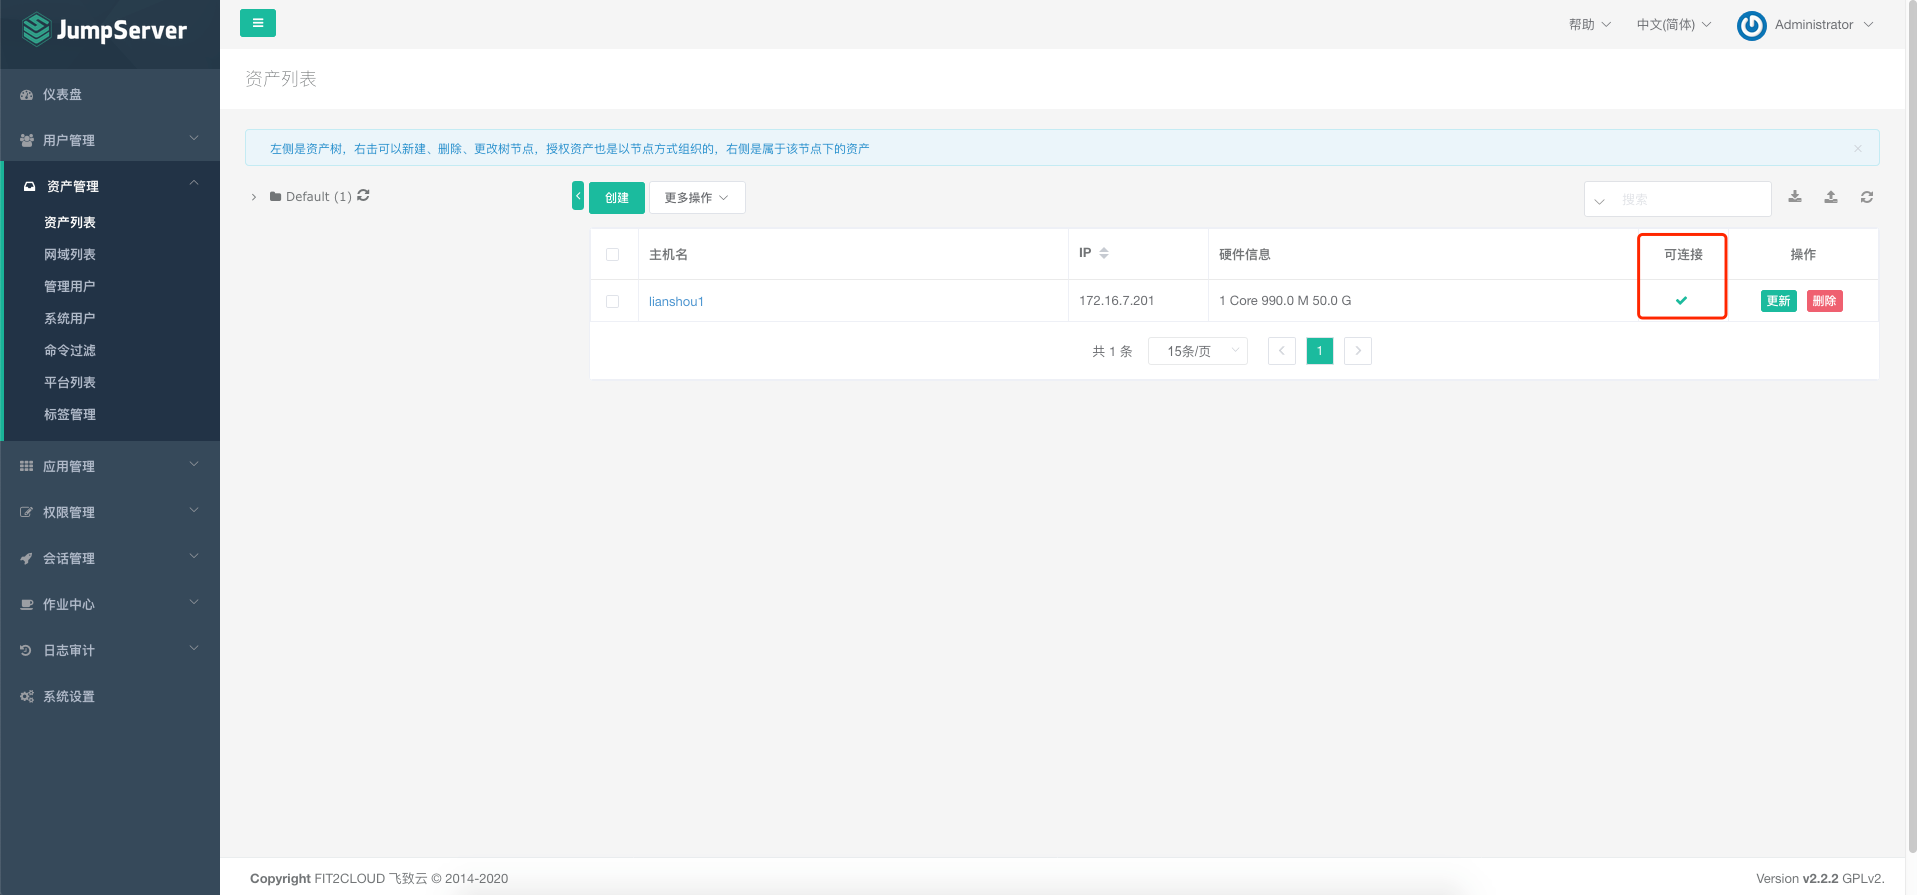 ##资产授权 以上步骤,是把管理用户,系统用户以及客户机添加到资产,但是没有具体授权给谁用,下面来授权。 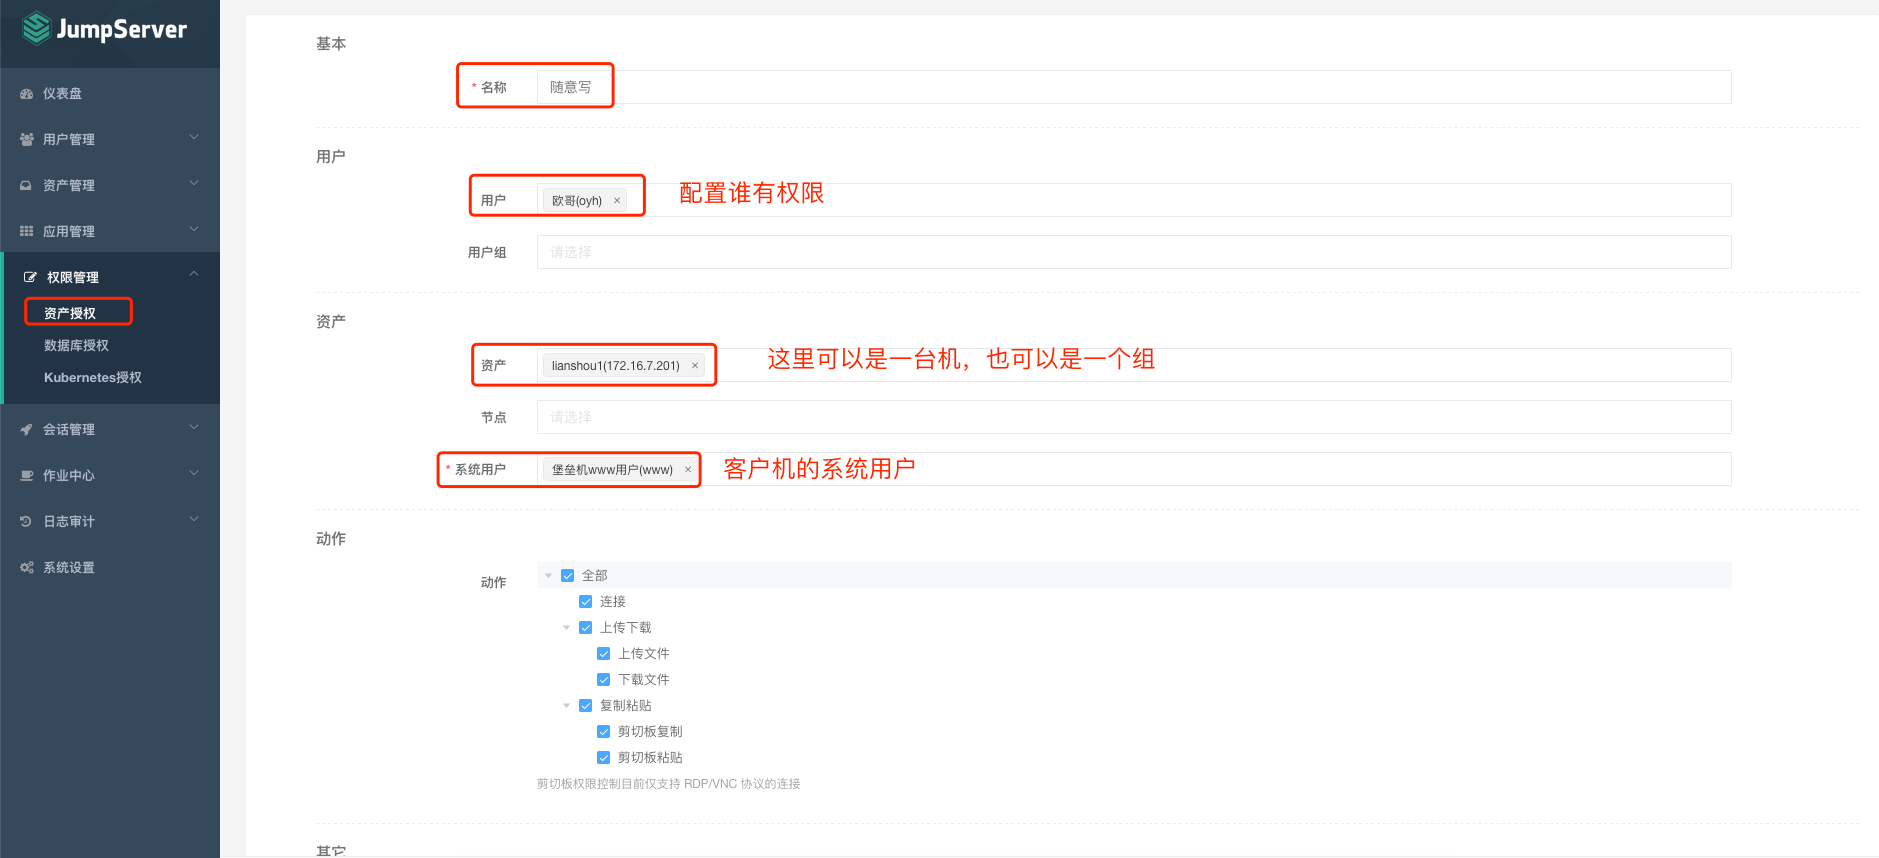 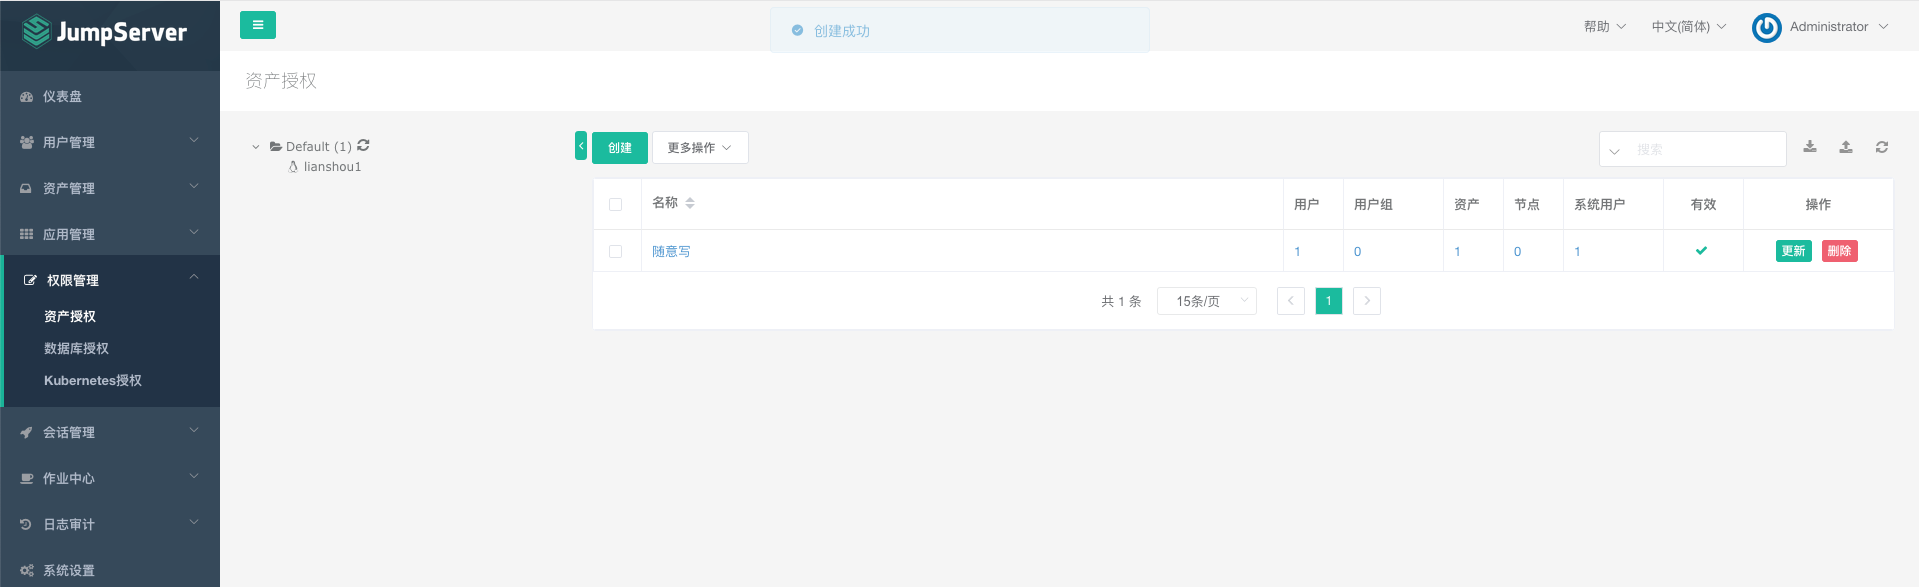 ##测试连接 两种方式:web页面,终端 - 1)web页面 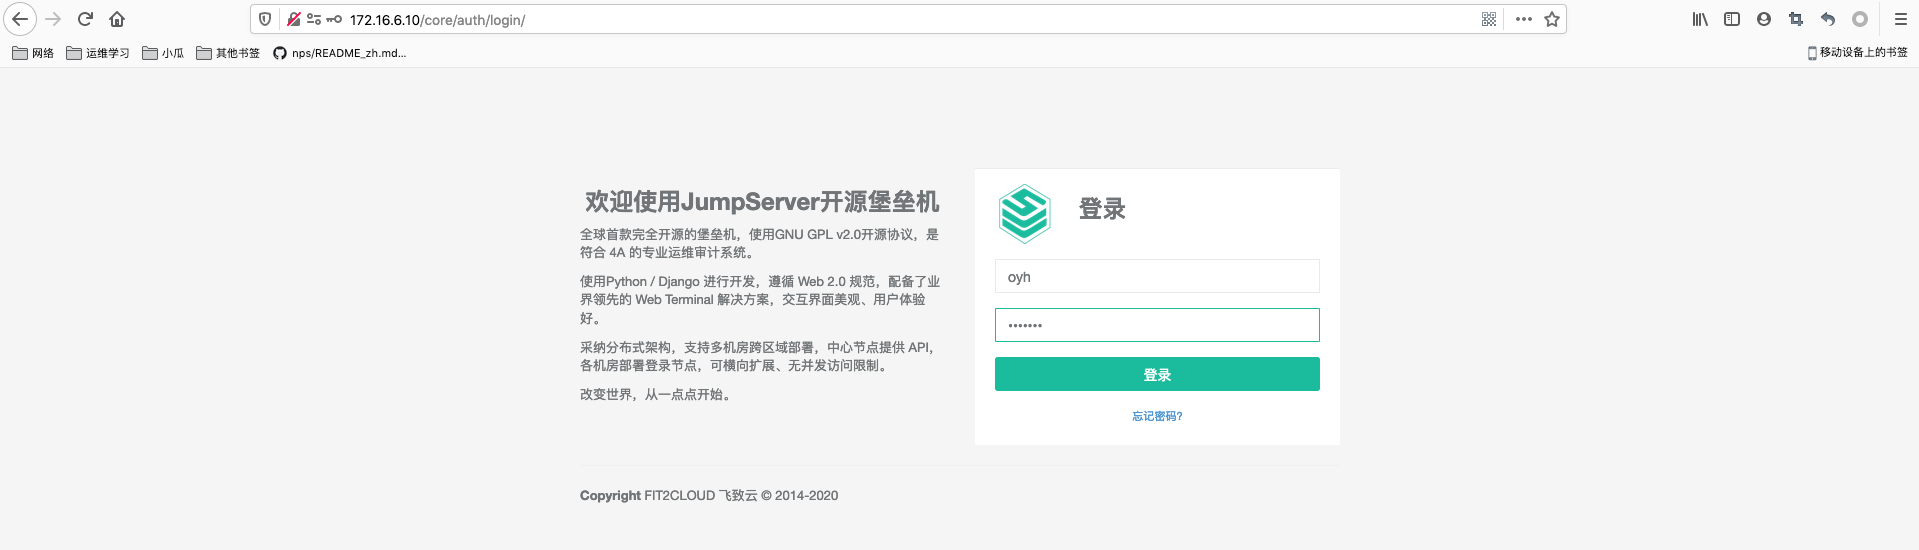   - 2)终端 ``` yuanhui:~ ewains$ ssh oyh@172.16.6.10 -p2222 ```   ##配置windows资产 - 1)配置管理用户 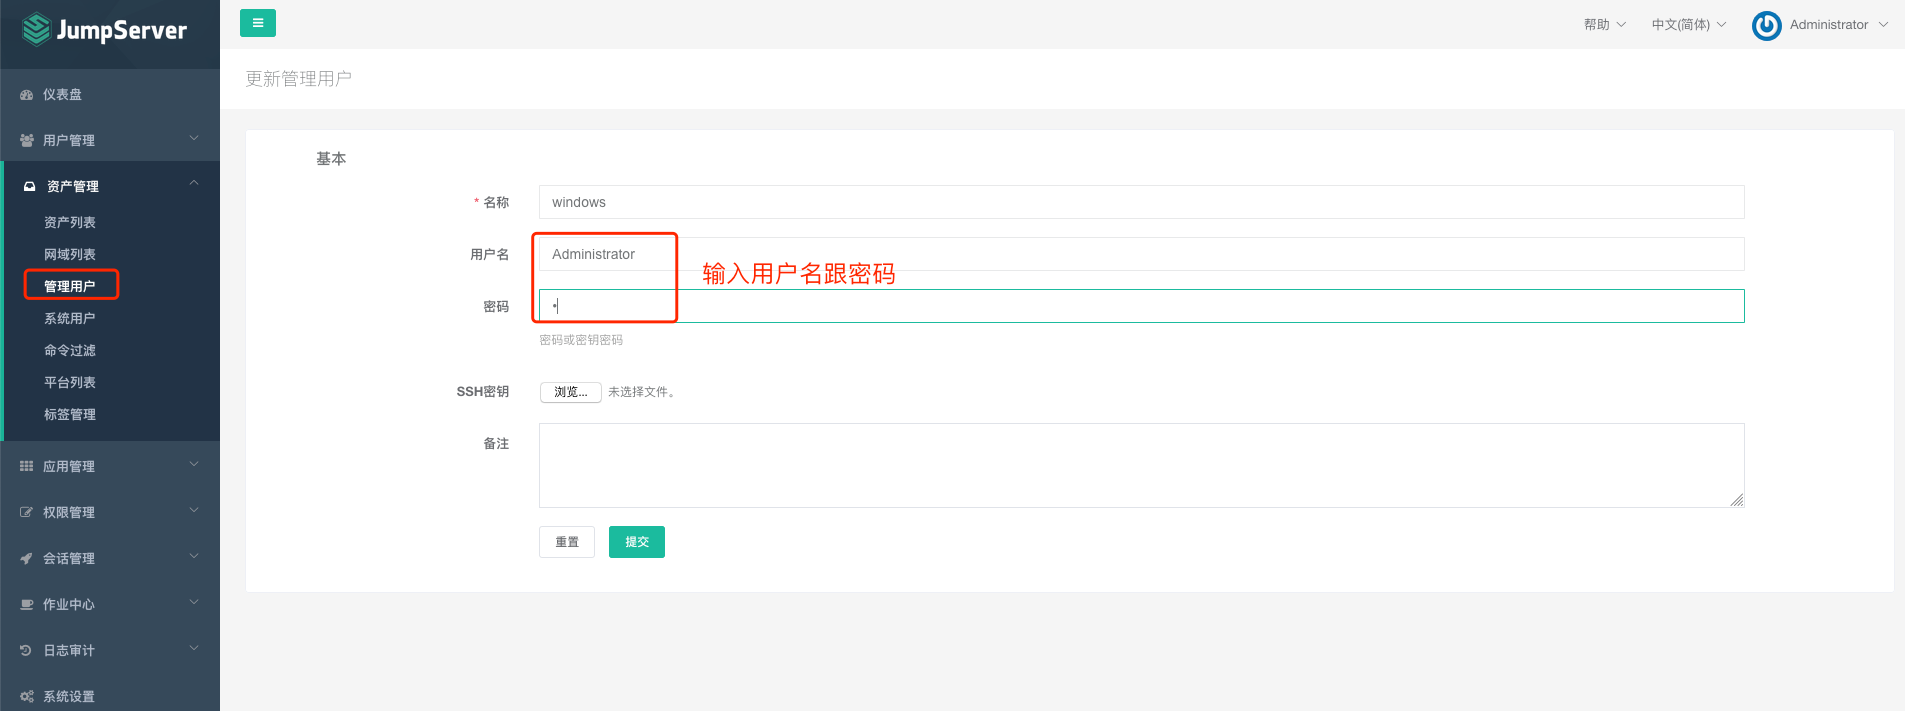 - 2)配置系统用户 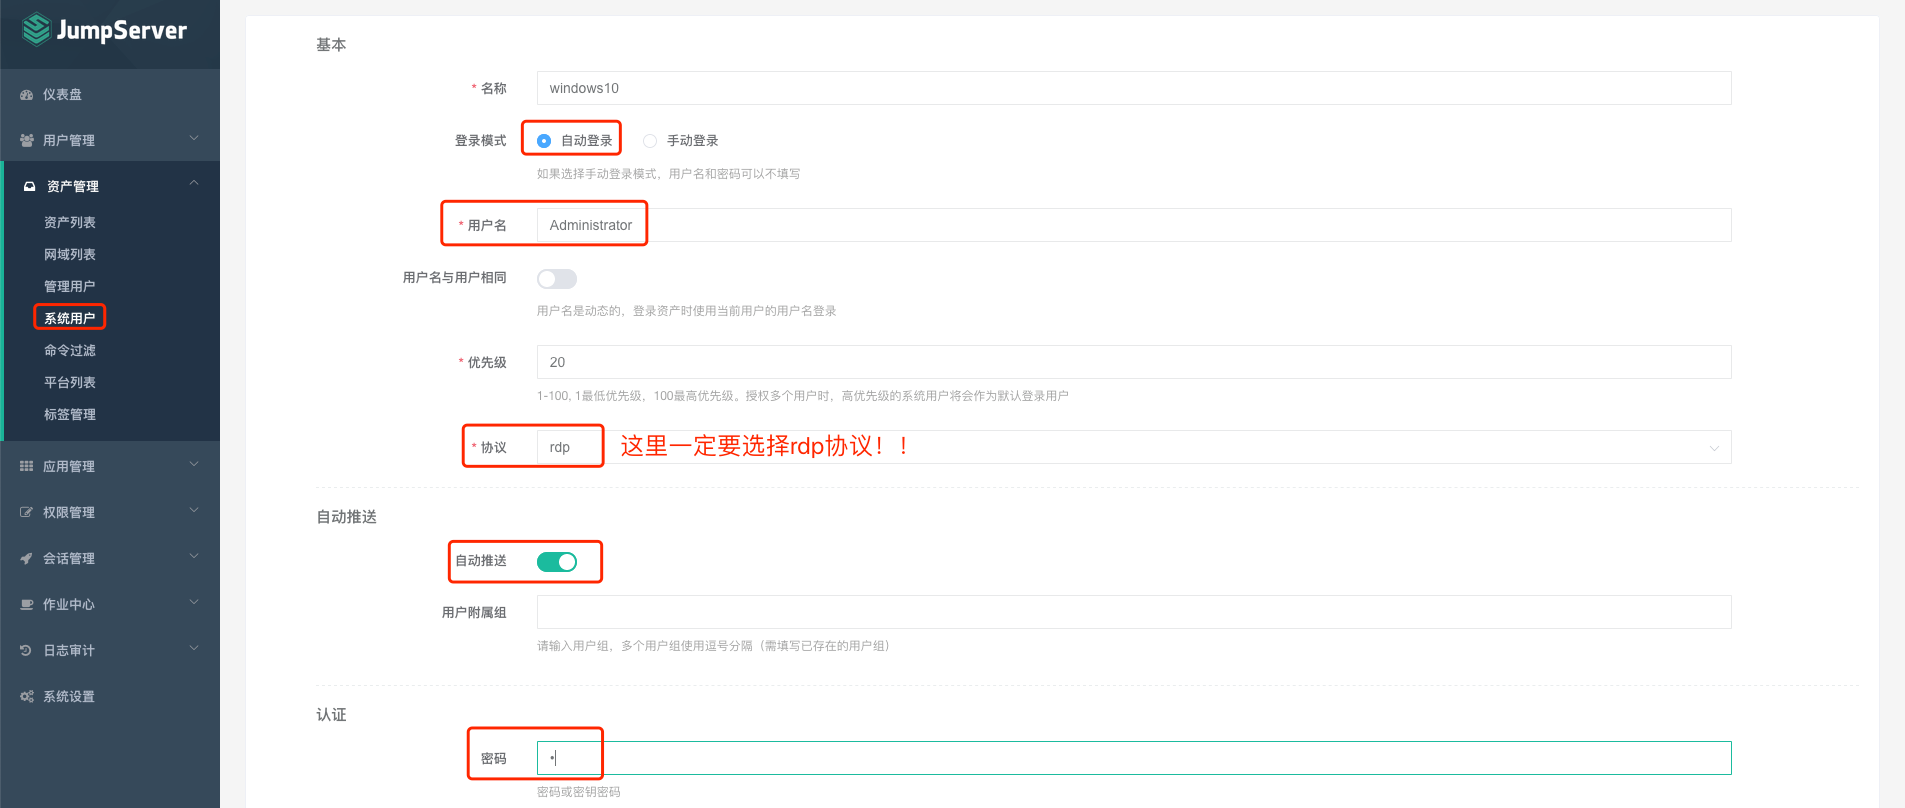 - 3)添加资产 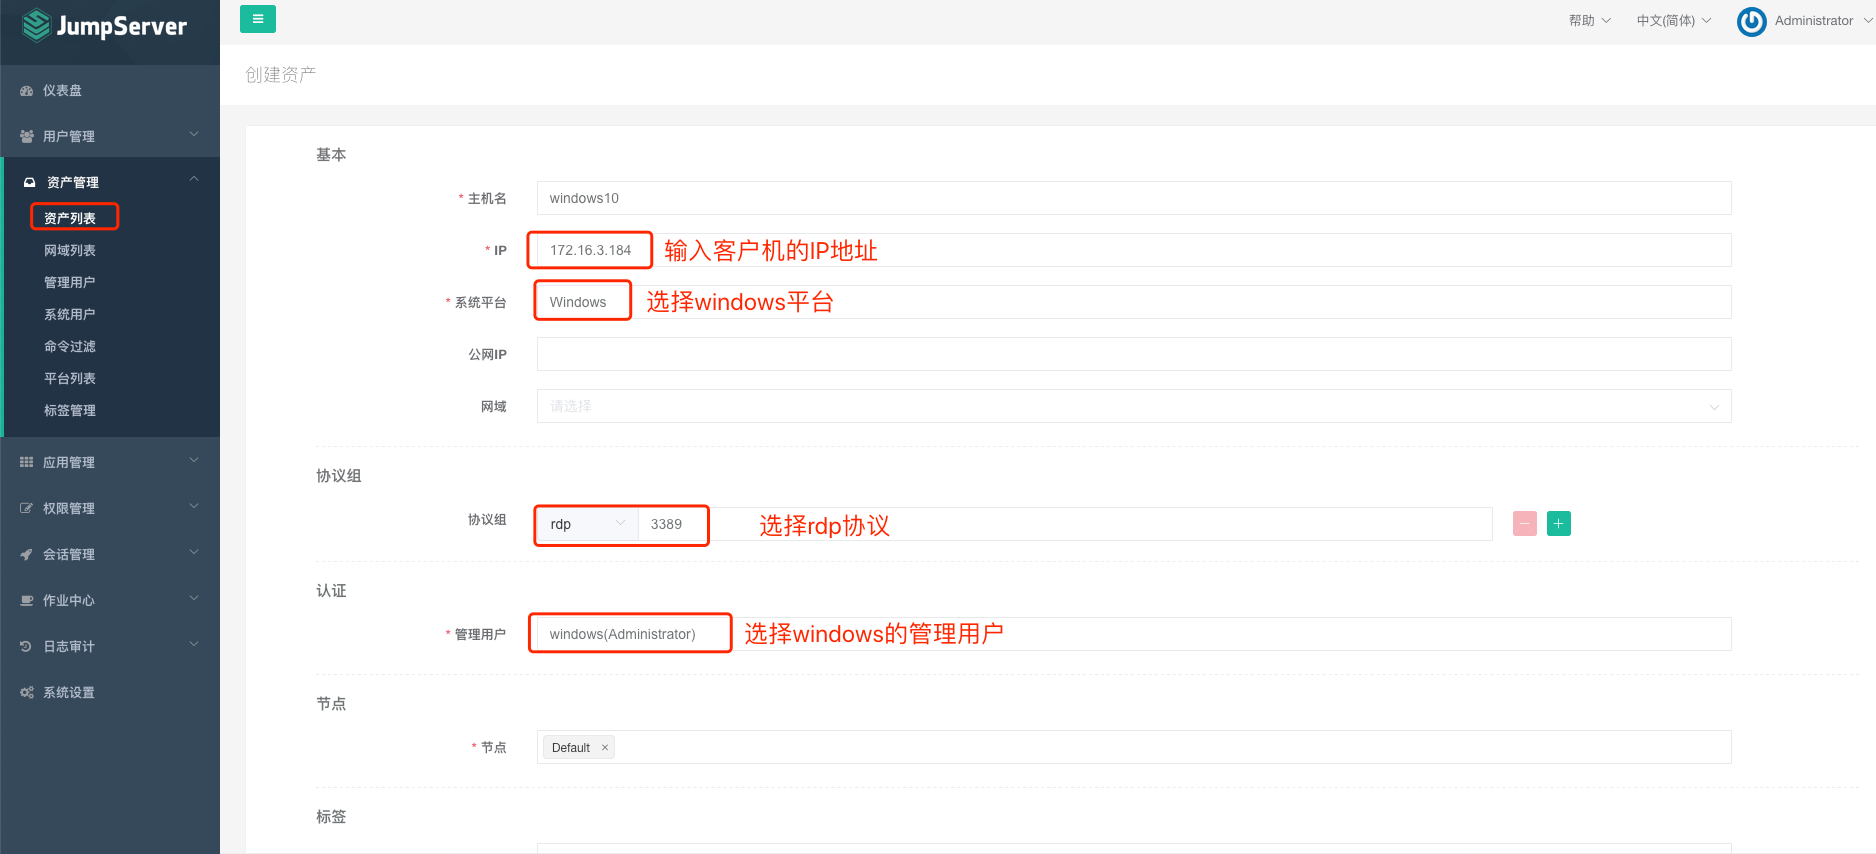 - 4)资产授权 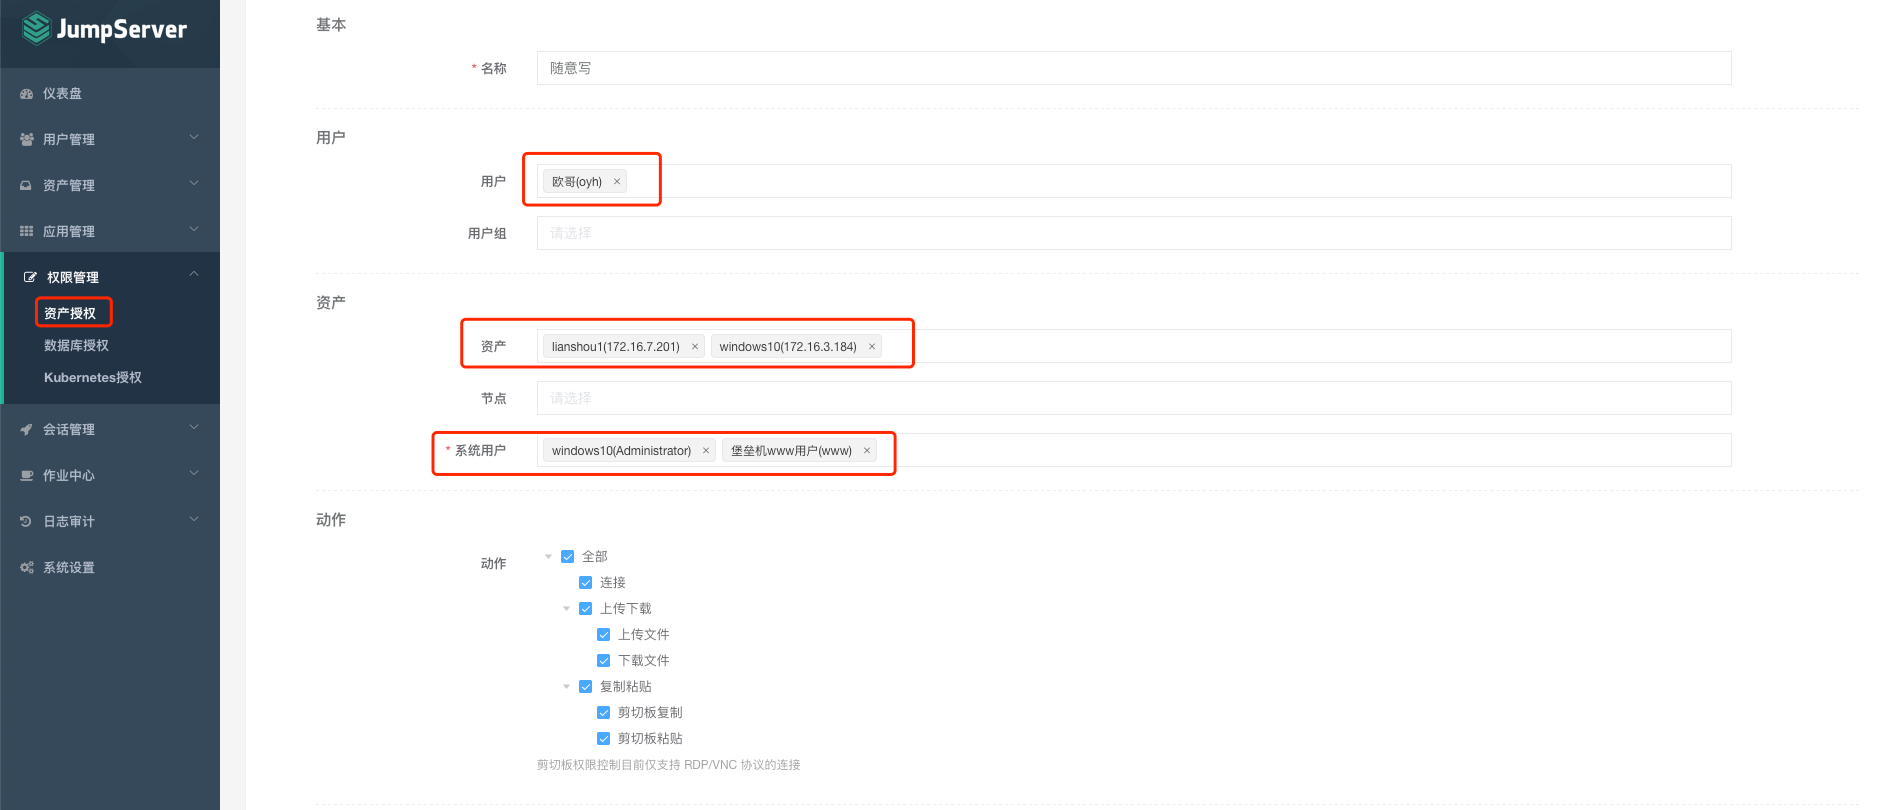 - 5)验证 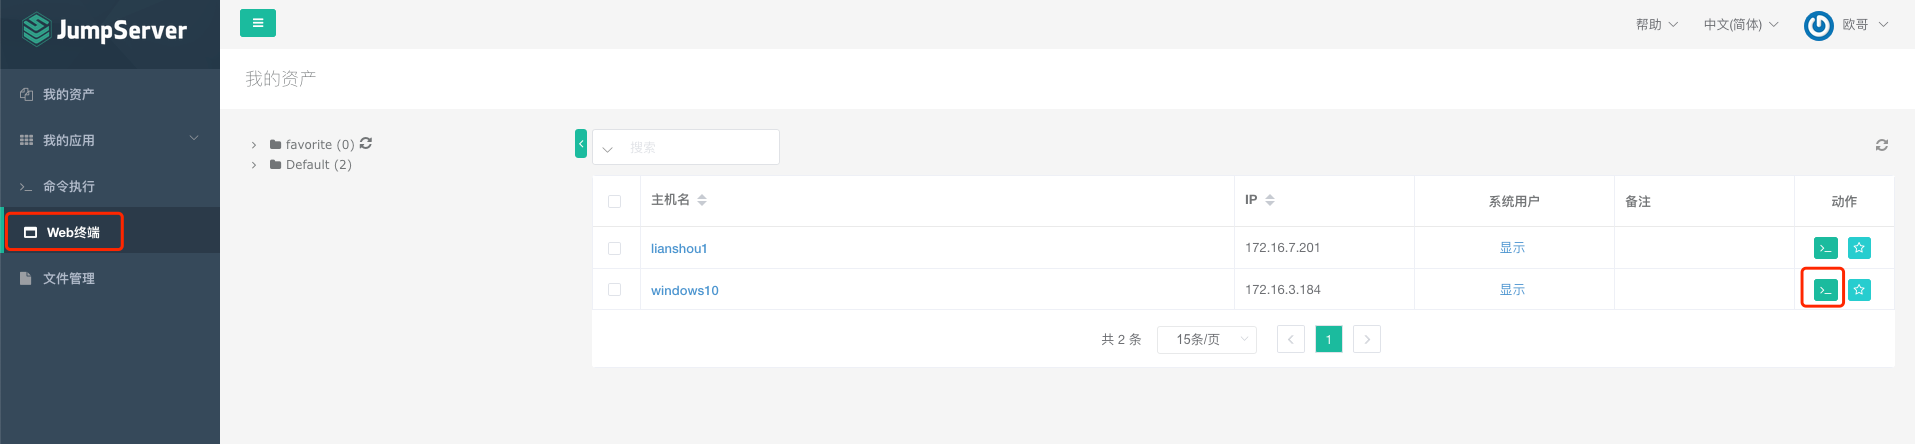  #重置超级管理员密码 ```bash [root@jumpserver ~]# source /opt/py3/bin/activate (py3) [root@jumpserver ~]# cd /opt/jumpserver/apps (py3) [root@jumpserver apps]# python manage.py changepassword admin Changing password for user 'Administrator(admin)' Password: Password (again): Password changed successfully for user 'Administrator(admin)' ``` # 新建超级用户的命令如下命令 `python manage.py createsuperuser --username=user --email=user@domain.com`
